
As the name suggests, shuffling slides means manipulating them to appear in a random order instead of their default order. It can be helpful in engaging your audience, especially when you aren’t presenting something sequential.
But how to shuffle slides in PowerPoint? You can shuffle or randomize slides using VBA or Visual Basic codes. Don’t worry; these codes aren’t highly complex, and you don’t have to use any other tools. Simply paste the codes I provide in this guide, and you are good to go.
I will show you the method with detailed steps so that you can easily shuffle your slides and make your presentations more interesting. Let’s get started.
How to Shuffle Slides in PowerPoint: Step-By-Step Guide
Depending on whether your presentation has duplicate slides or not, you can use two methods. Let’s start with the easier method: shuffling slides with duplicate slides.
Method 1: Shuffling Slides in PowerPoint With Duplicates
Follow these steps carefully to shuffle slides in a way that allows repeats or duplicates.
Step 1: Enabling the Developer Tab
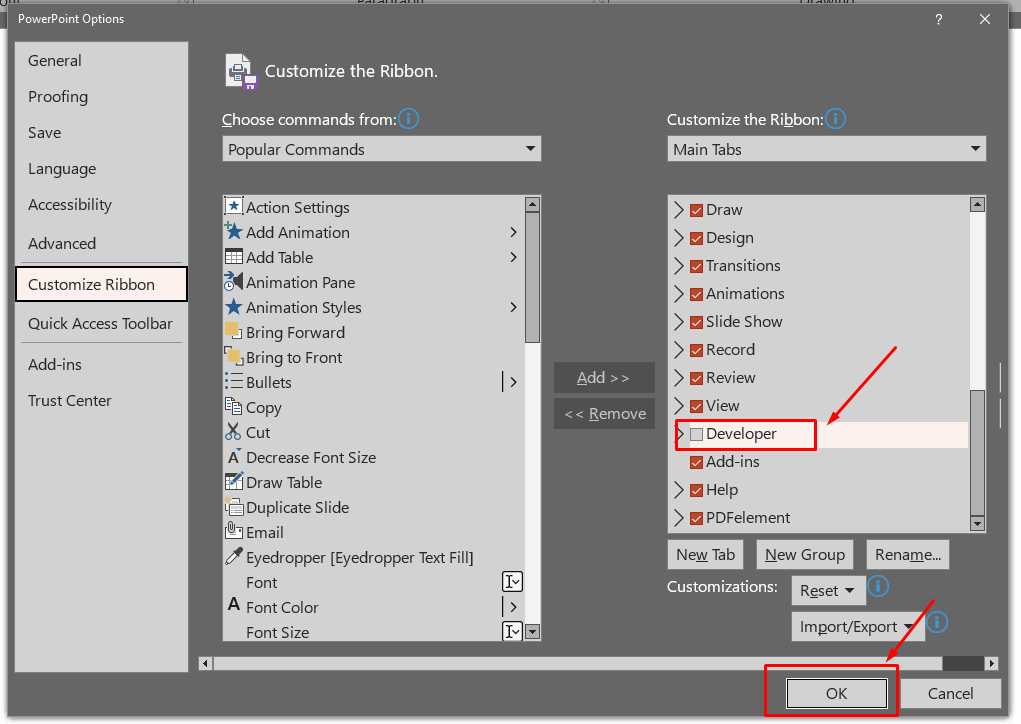
You need the Developer tab in PowerPoint to perform the next steps. It is hidden by default, so you need to enable it. Right-click on any empty space of the ribbon at the top of the screen. Then, click on Customize the Ribbon options.
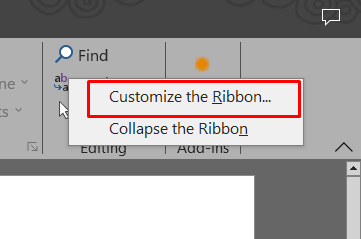
At the right side of the new dialog box, you will see a list of ribbons. Scroll down and tick the Developer checkbox. Then, click OK. The Developer tab will appear now.
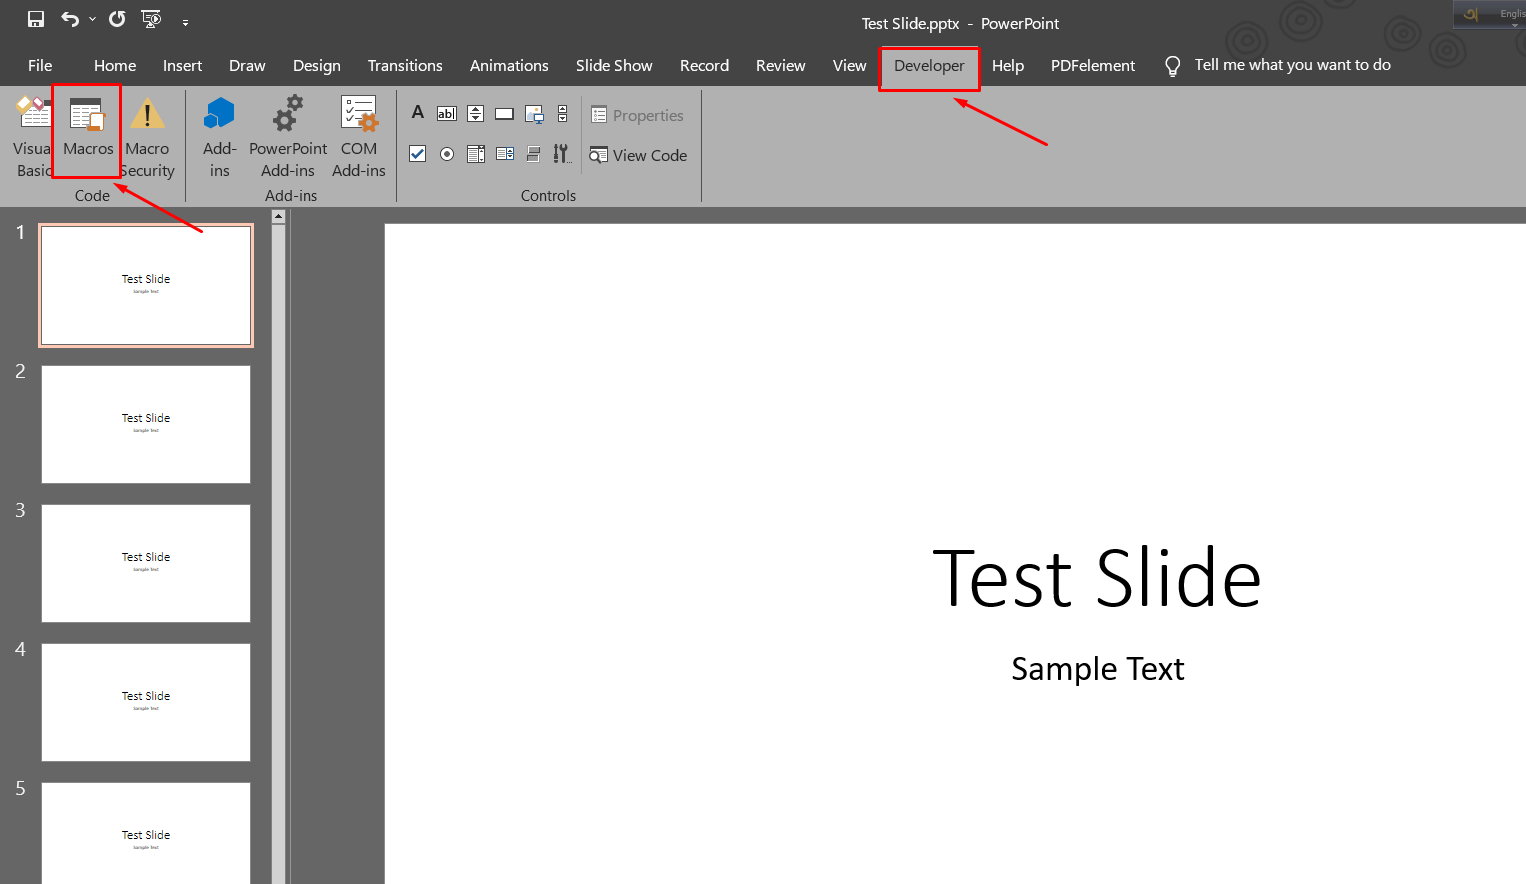
Step 2: Creating a Macro
Click the Developer tab. On the left side of the window, you will see the Macros option. Click on it to create a new Macro for this PowerPoint file. Alternatively, you can press Alt + F8 to create Macro.
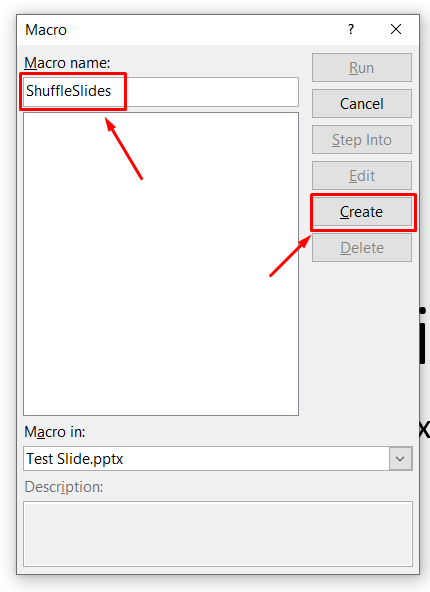
In the Macro dialog box, write the name of the module. I have written ShuffleSlides. Then, hit the Create button to open the code editor.
Step 3: Pasting the Code
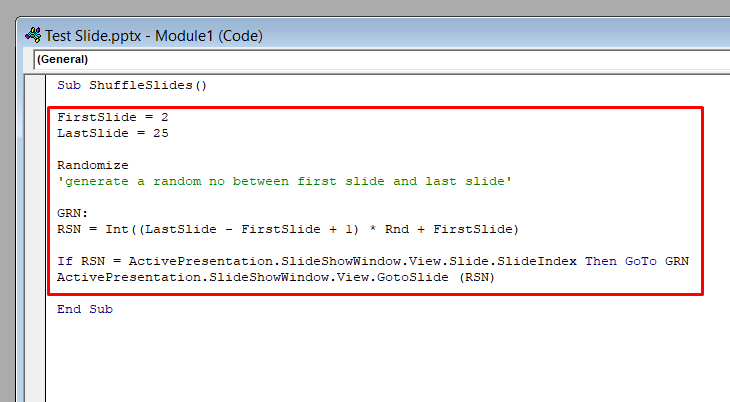
You don’t have to know coding to write VBA codes in the editor. I have the necessary codes for shuffling slides here. Select these codes by dragging the mouse while clicking the left mouse button. Then, press Ctrl + C to copy the code.
FirstSlide = 2
LastSlide = 25
Randomize
‘generate a random no between first slide and last slide’
GRN: RSN = Int((LastSlide – FirstSlide + 1) * Rnd + FirstSlide)
If RSN = ActivePresentation.SlideShowWindow.View.Slide.SlideIndex
Then GoTo GRN
ActivePresentation.SlideShowWindow.View.GotoSlide (RSN)
Go to the code editor. Then, click the cursor between the two existing lines. Press Ctrl + V to paste the code. It should look like this.
Step 4: Customizing the Code
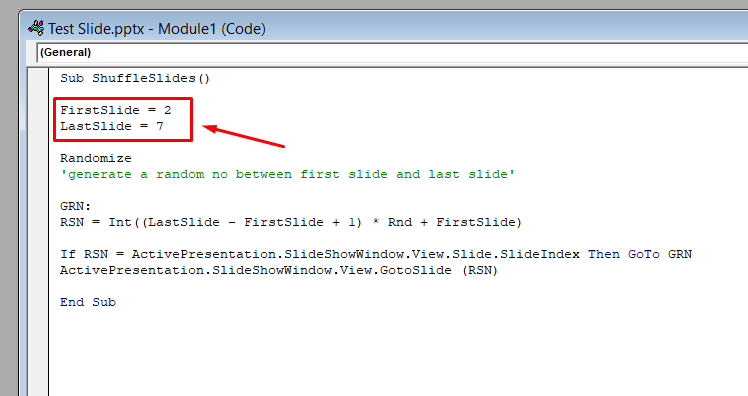
This is just a random code template found online. You need to customize the code to fit your needs. The FirstSlide section means where the shuffling will start, and the LastSlide means where the shuffling will end. As we don’t have 25 slides, we will modify these numbers.
Remove the existing number and input your desired number in the code editor. As I have only 7 slides in the test presentation, I have used numbers 2 and 7 as the starting and ending slides.
Step 5: Adding Action Buttons
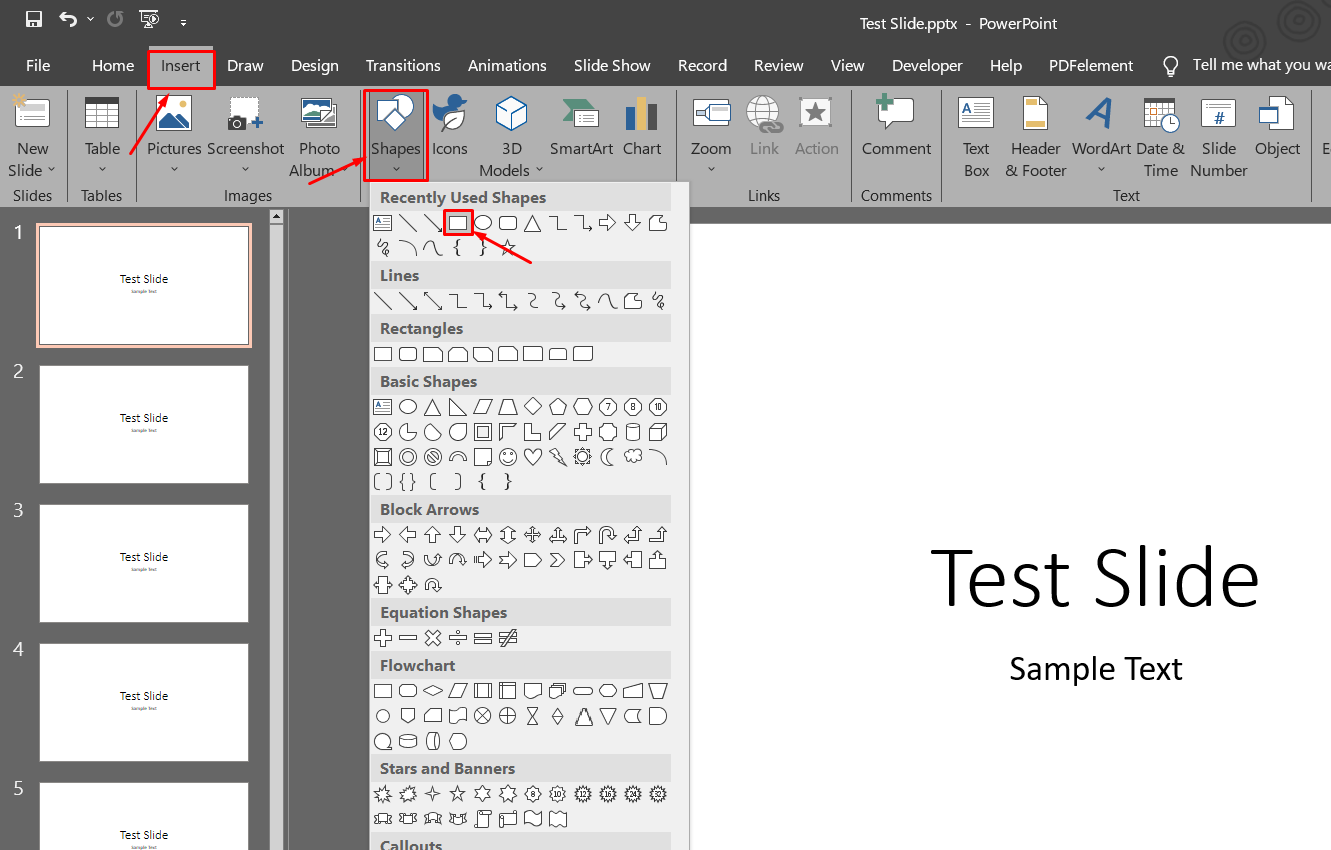
Now that the Macro is ready, we need to create a button that will run the Macro. To do this, you need to go to the Insert menu. Then, click on Shapes and choose any shape you want. In my case, I am choosing the rectangle.
After adding the shape to your slide, you can add some text if you want. For now, I am leaving the shape empty. Now, select the shape and go to the Insert menu. Click on Action from the ribbon.

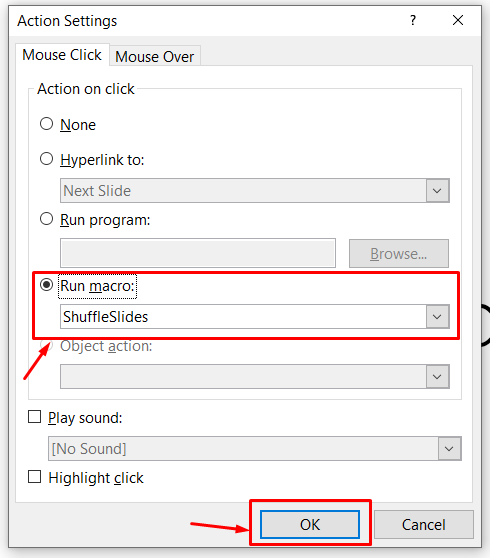
On the Action Settings dialog box, select the Mouse Click tab. Then click the Run macro radio button and make sure the created macro is selected. Finally, hit OK. The shape will now run the macro when you click on it.
Step 6: Copying Action Buttons
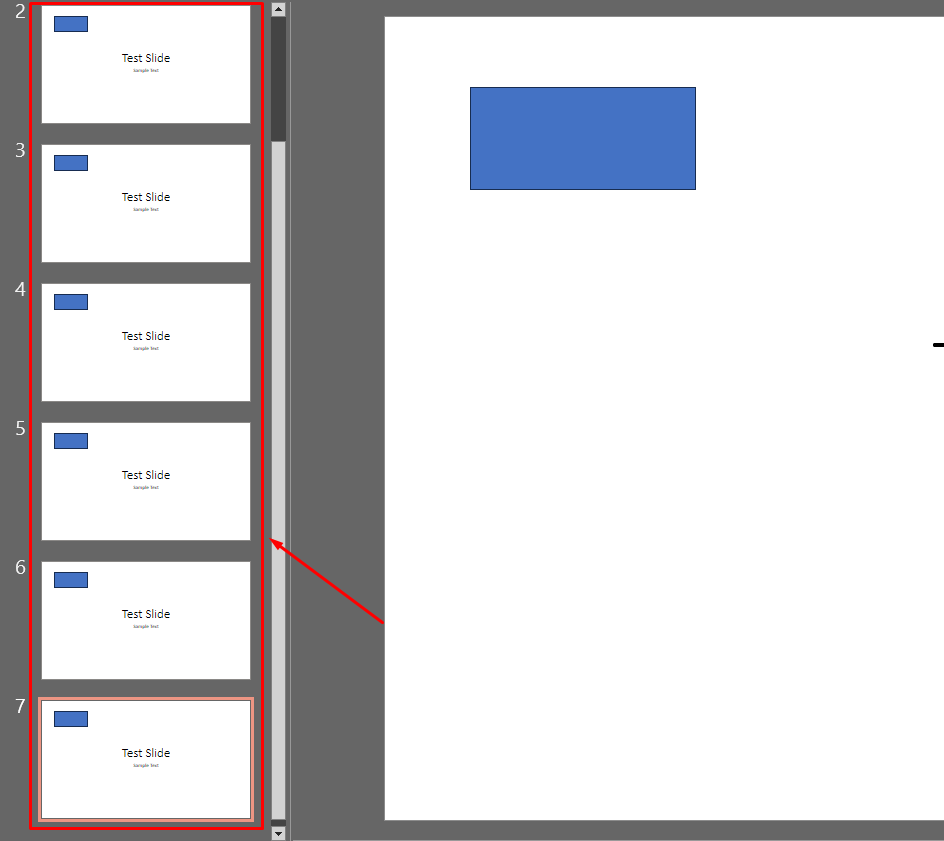
Now, copy the button you have just created and paste it on all slides you want to shuffle. For example, I will paste this button to slides 2-7.
Step 7: Test the Presentation
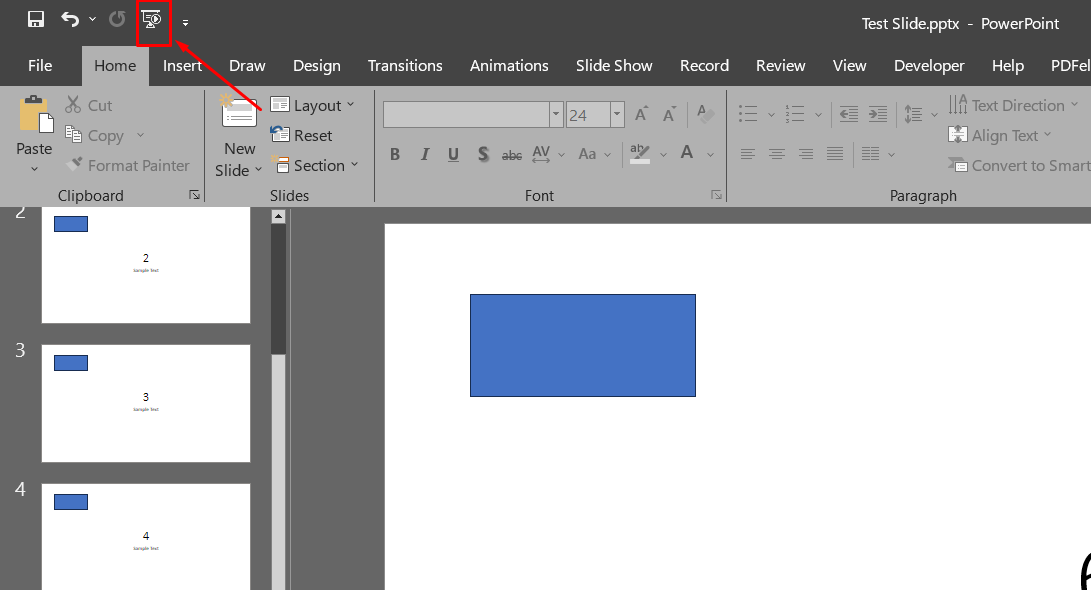
To understand if the macro is working correctly, you can change the text on each slide. Then, click the Presentation button at the top left corner of the window. The slides will appear in the presentation mode. Click the button you created and see the slides shuffle.
Check this video to see how the slides should behave:
Method 2: Shuffling Slides in PowerPoint Without Duplicates
If you want each slide to appear randomly without duplicates, this method will help you.
Step 1: Enabling Developer Tab
When trying this method in the beginning, you need to turn the Developer tab on. But as you have already turned it on, you don’t have to do it again. If you are reading the guide from here, follow the instructions above to turn the Developer tab on.
Step 2: Creating Macro
Just like I created a macro in the previous method, I will create another macro here. The codes for this macro are a bit different from the previous one. Go to the Developer tab and click on Macros.

Give the macro a name. I have used ShuffleRandomSlides for this macro. Then, click the Create button to open the code editor.
Step 3: Pasting the Code
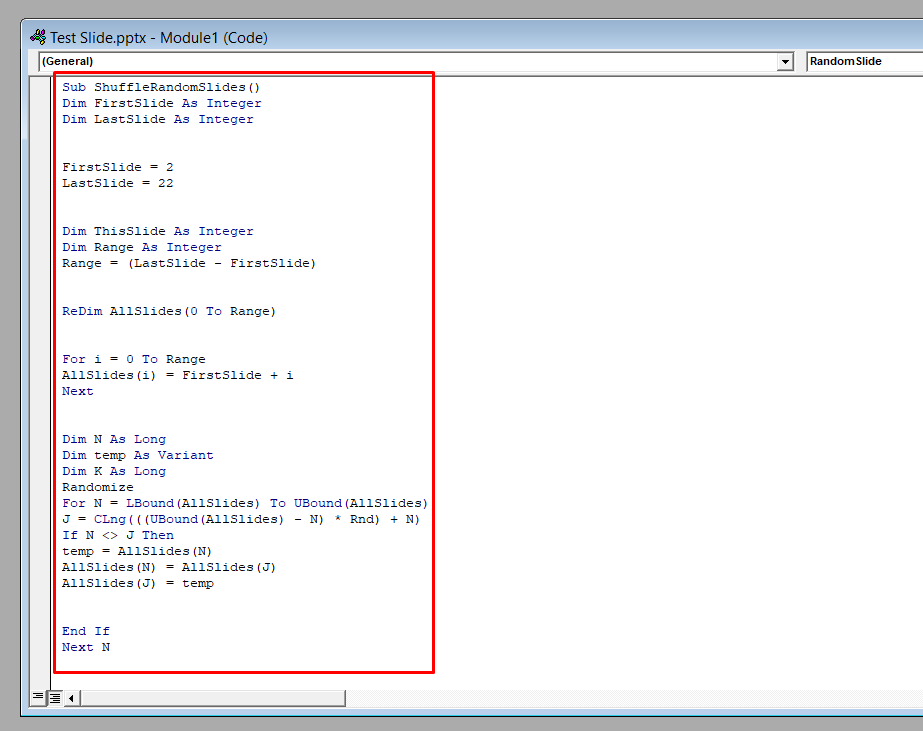
I will now provide the necessary code to shuffle your slides without duplicates. Select the code by dragging and clicking the left mouse button. Then, press Ctrl + C to copy the code. Go to the code editor and paste the code between the first and last lines by pressing Ctrl + V.
Dim FirstSlide As Integer
Dim LastSlide As Integer
FirstSlide = 2
LastSlide = 22
Dim ThisSlide As Integer
Dim Range As Integer
Range = (LastSlide – FirstSlide)
ReDim AllSlides(0 To Range)
For i = 0 To Range
AllSlides(i) = FirstSlide + i
Next
Dim N As Long
Dim temp As Variant
Dim K As Long
Randomize
For N = LBound(AllSlides) To UBound(AllSlides)
J = CLng(((UBound(AllSlides) – N) * Rnd) + N)
If N <> J Then
temp = AllSlides(N)
AllSlides(N) = AllSlides(J)
AllSlides(J) = temp
End If
Next N
Position = 0
ActivePresentation.SlideShowWindow.View.GotoSlide AllSlides(Position)
End Sub
Sub RandomSlide()
Position = Position + 1
If Position > UBound(AllSlides) Then
ActivePresentation.SlideShowWindow.View.GotoSlide (1)
End If
ActivePresentation.SlideShowWindow.View.GotoSlide AllSlides(Position)
After pasting the code, the editor should look like this.
Step 4: Customizing the Code
As we have customized the starting and ending slides in the previous method, you need to edit the FirstSlide and LastSlide values in the editor. For example, if you have a presentation title on the first slide, leave that intact. Write 2 as the value of the FirstSlide and 7 as the value of the LastSlide.
Another customization part is selecting the slide where you want to end the presentation. Edit the number in the following code section to select your preferred final slide.
Step 5: Adding Action Buttons
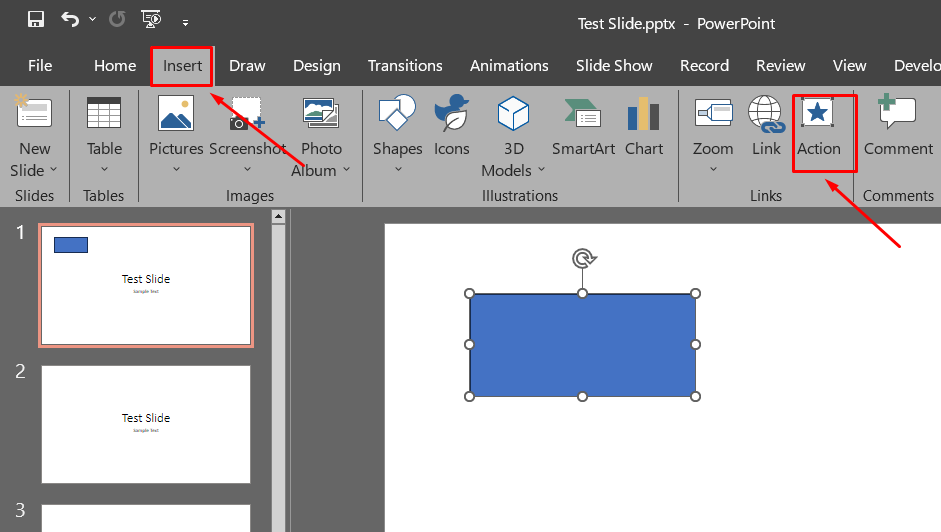
To run the macros you have just created, you need to create an action button. First, go to the Insert menu and select a shape of your choice. Draw the shape on the slide.
Then, select the shape and go to Action from the Insert menu.
Now, you need to enable the macro option. Select the Mouse Click tab and click the Run macro radio button. Make sure your most recent macro is selected, and then hit OK. Whenever you click this button, the macro will run.
:![]()
Step 6: Duplicating Action Buttons
All the slides you want to shuffle need this action button. So, copy the button by selecting it and pressing Ctrl + C. Then, go to each slide and paste the button on there by pressing Ctrl + V.
Step 7: Test the Presentation
Simply click the presentation button at the top left corner to start the presentation. In the presentation mode, you can click the action button to shuffle the slides randomly.

Also follow about Fitness Google Slides
How to Save the Presentation After Shuffling?
Once you have added macros to your slides, saving them in the default format won’t be helpful. This is because the default .pptx format doesn’t process the macros, and they will be lost. You need to save the presentation in .pptm format. Here is how to do it.
Step 1: Go to Save As
Click on File.
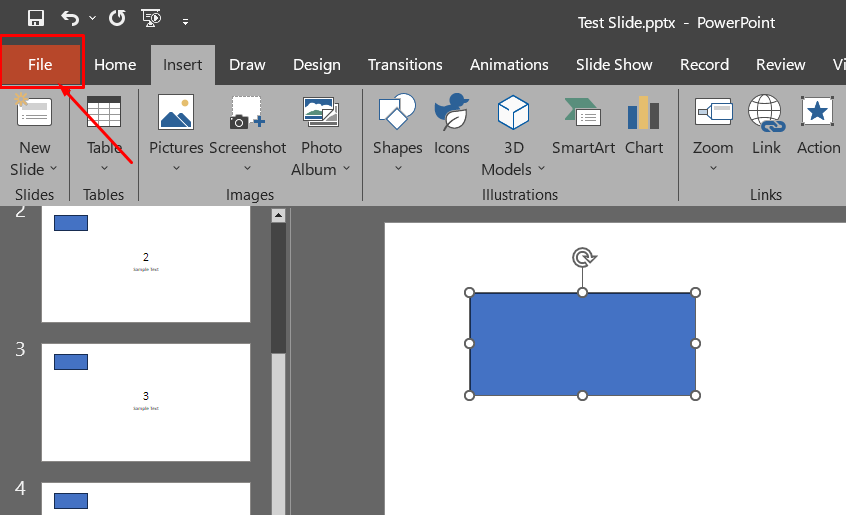
Then, select the Save As option from the menu.
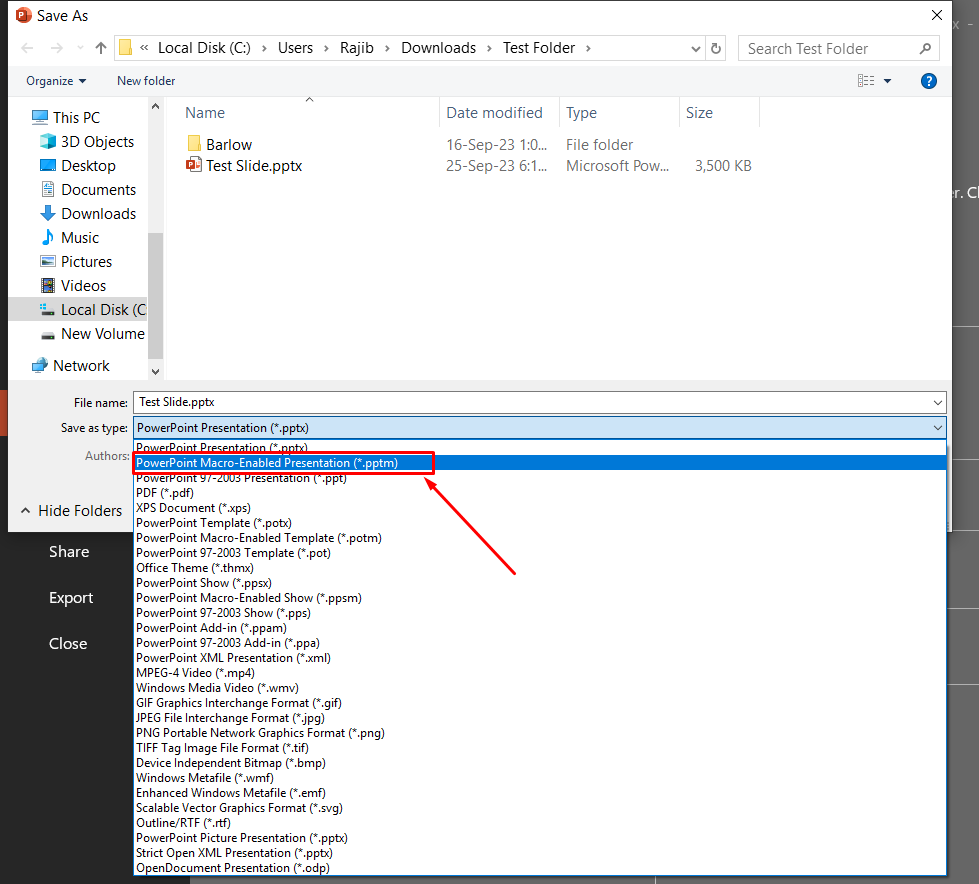
Step 2: Choose the Location and File Format
Now, choose your desired folder to save the presentation. From the Save as Type drop-down menu, select PowerPoint Macro-Enabled Presentation (.pptm). This will ensure your macros work the next time you open the file or send it to someone else.
Conclusion
Shuffling slides may seem a bit complex until you try it on your own. It requires some codes, but that isn’t a big deal. I showed how to shuffle slides in PowerPoint with the least amount of codes. Besides, I showed the steps to edit the codes and customize the buttons.
With the help of this guide, you will be able to add some charm to your presentations. Shuffling slides will boost the attention of your audience to the presentation.
Also Read: How-to-delete-animations-in-power point