
How to Bring Your Presentation to Life with Video
People often lose focus during presentations. They stare at the screen and stop listening. You can fix this problem easily. You just need to break up the text. Adding a video is the best way to do this. A good video grabs attention immediately. It brings new energy into the room. It also gives your voice a short break.
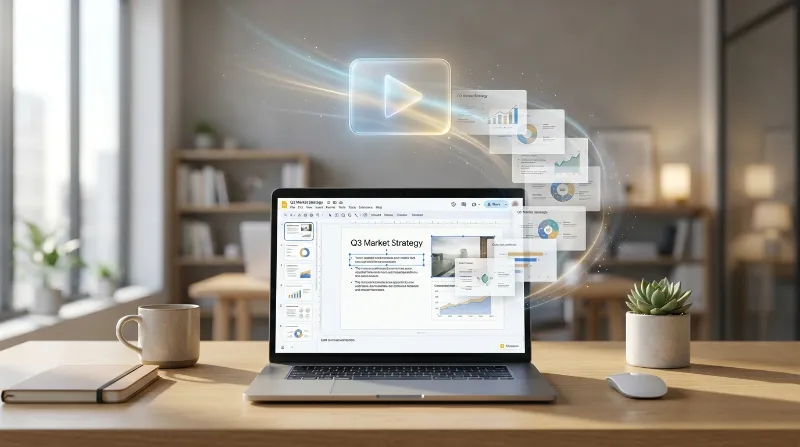
You might think adding video is a complicated process. It actually takes very little effort. You do not need to be a computer expert. You do not need to buy expensive video software. You can embed video Google Slides using tools that are already built into the platform. The system handles all the heavy lifting for you.
This guide will show you exactly how to do it. We will cover the fastest ways to add YouTube to Google Slides. We will look at how to use your own private videos from Google Drive. We will also explore the different settings you can change. You will learn how to make the video play exactly when you want it to. Finally, we will go over some common problems and how to fix them quickly.
Searching for and Inserting YouTube Videos Within the App
YouTube and Google Slides are both owned by the same company. They are designed to work together perfectly. You can find and place a video on your slide without ever leaving your presentation window. This is the fastest way to add media to your project.
First, open your presentation. Scroll down your list of slides on the left side of the screen. Click on the exact slide where you want the video to appear. Look toward the top of the screen and find the menu bar. Click on the word Insert. A drop-down menu will open. Look down the list and click on Video.
A new window will pop up right in the middle of your screen. This window is your main tool for adding Google Slides multimedia. You will see a search bar near the top. You can type keywords into this box just like you would on the main YouTube website. Press the enter key on your keyboard to run the search.
A list of video thumbnails will appear below the search bar. You can scroll down to look through the options. Click on the video that looks right for your presentation. A blue line will appear around the thumbnail. This means the video is selected. Look toward the bottom corner of the window and click the Insert button. The video will drop directly onto your slide.
Using a Specific YouTube Link
Sometimes the built-in search tool does not show the exact video you want. You might need a very specific clip. You can handle this easily by finding the video yourself first.
Open a new tab in your internet browser. Go to the main YouTube website. Search for your video there. Click on the video so it starts playing. Look up at the address bar at the very top of your browser. Copy the entire web address. Make sure you highlight the whole link before you copy it.
Go back to the browser tab holding your presentation. Open the Insert menu again and click Video. Look across the top of the pop-up window. You will see different tabs. Click on the tab labeled YouTube. Paste your copied link into the search box. A preview of your specific video will appear instantly. Click on that preview. Click the Insert button to finish the process.
Adjusting the Video on Your Slide
The video might look too small when it first appears on your slide. It might also be sitting right over your text. You need to fix the size and placement. Click once on the video. Small blue squares will appear in the corners and along the edges.
Click and hold one of the corner squares. Drag your mouse outward to make the video larger. Drag inward to make it smaller. Always use the corner squares for resizing. Dragging the side squares will stretch the video out of shape. The people in the video will look distorted.
You can also move the video around. Click right in the middle of the video and hold the mouse button down. Drag the video to a blank spot on your slide. Red guide lines will appear as you move it. These lines help you center the video perfectly. Release the mouse button when you find the right spot.
Uploading and Embedding Custom Videos from Google Drive
YouTube is great for public videos. You might not always want to use public videos. You might have a private company update to share. You might have a video showing sensitive financial data. You might just want to avoid the advertisements that sometimes play on YouTube. You can use Google Drive for these situations.
This method keeps your files private. Only people who have permission can see them. It also looks very clean during a presentation. There are no suggested videos popping up on the screen when your clip finishes playing.
Preparing Your Video File
You need to put your video into your cloud storage before you can use it. Open a new browser tab and log into your Google Drive account. It helps to create a specific folder for your presentation files. This keeps things organized. Open that folder.
Look toward the upper left corner of the screen. Click the button that says New. Choose the option called File upload. A window will open showing the files on your computer. Find your video file and click on it. Click the Open button. A small box will appear in the corner of your screen. It will show the upload progress.
You have to wait for the upload to finish completely. Google Drive then takes a few minutes to process the video. You cannot play the video immediately. The system needs time to make it readable for the web. Go get a drink of water and come back. The video will be ready soon.
Adding the Drive Video to Your Slide
Return to your presentation window. Select your slide. Click the Insert menu and choose Video. Look at the tabs across the top of the pop-up window. Click on the Google Drive tab.
You will see all the videos you have saved in your cloud storage. Your newest upload should be the first one on the list. If you cannot see it, you can use the search bar. Type the exact name of the file into the search box. Press enter to find it.
Click on your video to select it. Click the Insert button. The video will appear on your slide. You can resize it and move it around just like a YouTube clip. Grab the corners to make it bigger. Drag it to a spot where it looks good.
You should try to use MP4 files when you upload to Google Drive. MP4 is a very common format. It works perfectly with Google Slides multimedia tools. It provides a clear picture without taking up too much storage space. MOV files and AVI files usually work too. MP4 is just the safest choice for a smooth experience.
Configuring Playback Options Like Start Times and Autoplay
Putting the video on the screen is only the first part of the job. You also need to control how it behaves. You do not want to fumble with your mouse during a speech. You want the video to play exactly when you need it. Google gives you a special menu to handle this.
Click on the video on your slide. Look toward the top toolbar. You will see a button labeled Format options. Click that button. A panel will slide open on the right side of your screen. Click the section called Video playback. This opens a list of important settings.
Choosing How the Video Starts
The first setting controls when the video begins. Click the drop-down menu to see your choices. You have three different ways to start the playback.
Play on click is the first option. This means the video waits for you. You must press the spacebar or click your mouse to start the video. This is useful if you have text on the slide. You can talk about the text first. You can start the video whenever you are ready.
Play automatically is the second option. The video starts the exact moment you change to that slide. This creates a very smooth experience. You do not have to click anything. You just advance your presentation and the video runs. This is the best choice if the video is the only thing on the slide.
Play manual is the third option. You have to move your cursor over the video and click the actual play button. This takes more effort. It is usually better to use the other two options for a live speech.
Trimming the Video Length
You rarely need to show a ten-minute video. People lose interest quickly. You probably just need a short thirty-second clip. You can cut out the extra parts right inside the Format options panel.
Look for the boxes labeled Start at and End at. You can type specific times into these boxes. Type the exact minute and second where you want the clip to begin. Type the exact minute and second where you want it to stop. The video will now only play that specific section. You do not have to skip around manually while your audience watches.
Controlling the Sound
Sometimes you want to show a video while you continue talking. Background noise from the video will distract your audience. They will not be able to hear your voice clearly.
You can fix this by muting the video. Look for the small checkbox labeled Mute audio in the playback panel. Click the box to add a checkmark. The video will now play silently. This is perfect for showing a silent demonstration or a visual process while you explain what is happening.
Troubleshooting Common Video Playback and Permission Issues
Technology does not always cooperate. You might run into problems when you try to show your presentation to a crowd. Nothing is worse than clicking a slide and seeing an error message. Do not panic. Most problems are very easy to fix if you know what to look for.
Fixing Google Drive Permissions
The most common problem happens with private videos. You might build a beautiful presentation and share it with a coworker. Your coworker opens the file. They see a gray box instead of a video. The box says they need permission to view the media.
This happens because your presentation and your video have different security rules. Sharing the presentation file does not automatically share the video file. The video is still locked in your private cloud storage.
You need to change the rules on the video file. Open your Google Drive account. Find the video you uploaded earlier. Right-click on the file name. A menu will appear. Click on the word Share. A new box will open on your screen.
Look for the section called General access. It probably says Restricted. Click on the word Restricted. Change it to Anyone with the link. Click the Done button to save the change. Your coworker can now open the presentation and watch the video without any problems.
Dealing with Network Restrictions
You might finish your presentation at home and everything works perfectly. You take your computer to a school or a large office building. You connect to their internet. Suddenly, your YouTube videos refuse to play.
Many schools and businesses block YouTube on their local network. They do this to stop people from wasting time. If the network blocks the main website, your presentation cannot reach the video file. The slide will just show a blank space or an error.
You have a few ways around this. You can turn on the personal hotspot feature on your mobile phone. Connect your computer to your phone instead of the building network. This bypasses the local restrictions entirely. The video should play normally.
Your best backup plan is to avoid YouTube entirely for important meetings. Use the Google Drive method we talked about earlier. Most corporate and educational networks do not block Google Drive. Your files will stream safely and securely.
Handling Missing Videos
Sometimes a YouTube clip just disappears. The person who originally uploaded the video might decide to delete it. They might change the settings to make it private. They might restrict it from playing on other websites. A message will appear on your slide saying the video is unavailable.
You cannot force a deleted video to play. You have no control over other people’s YouTube channels. You just have to find a replacement video. You should always click through your slides the day before a big speech. Make sure every video still works. Having a backup plan is a smart move.
Video Presentation Tips for a Better Experience
Knowing how to embed video Google Slides is just the beginning. You also need to know how to use those videos effectively. Poorly planned media can ruin a good speech. These video presentation tips will help you look like a professional.
- Keep your clips short. Your audience came to hear you speak. They did not come to watch a long movie. Try to keep your videos under two minutes. Use the start and end time settings to show only the most important parts.
- Make the video large. A tiny video sitting in the corner of a slide is useless. People in the back of the room will not be able to see it. If the video is the main focus, drag the corners until it covers most of the slide.
- Limit text on video slides. Do not put a long paragraph of text next to a playing video. The human brain cannot read complex sentences and watch a moving picture at the same time. Put your text on the slide before the video. Let the video stand alone.
- Introduce the clip. Do not just switch to a slide and stand there in silence. Set the stage. Tell the audience what they are about to see. Explain why you are showing it to them. Give them a specific detail to look for while they watch.
- Summarize the main point. When the video ends, start talking immediately. Do not leave dead air in the room. Summarize what just happened on the screen. Connect the video back to your main topic. This reminds the audience why the clip was important.
- Test your sound. Bad audio is incredibly distracting. Plug your computer into the room speakers before the meeting starts. Play a few seconds of your video. Walk to the back of the room and listen. Make sure the volume is comfortable. You do not want to blast people out of their chairs.
Using media is a powerful way to share your message. It breaks the boring routine of endless bullet points. Now you know exactly how to manage your presentation files. You know how to add public clips and how to secure private ones. You know how to fix problems quickly before anyone notices. Take these steps and upgrade your next big project. Your audience will thank you for it.